Rendering 3D objects in Flash
Displaying 3D objects in your presentation, whether it is a web page or not, always adds a notch because the most user-friendly way to present your data is to use symbols familiar with objects a person can easily identify. Macromedia Flash is a powerful and flexible tool for building,
testing, and deploying multimedia Web content but, unfortunately, it does not possess functions for manipulation of 3D models.
You do not have to be a rocket scientist or have any math knowledge to make a 3D presentation in Flash 5.
This tutorial is for the mathematically handicaped ppl,
and the general idea as well as the source code is based on Bill Tagliaferro's
tutorial Wireframe Objects and 3D Rotations.
To follow this tutorial you will need:
- Basic Knowledge of Macromedia Flash 5
- Any application that can create a 3D model and export it in .ASC format.
For this tutorial 3D Studio Max ver 3 has been used.
- Microsoft Word 2000. Since most ppl use MS Office 2k, my first attempt is to publish some useful code in WordBasic, that can be run as a macro.
Later on, I'll upload a VB executable.
I'll make the math part simple. You can pass the explanations and simply follow the steps
to achieve the desired effect.
Step 1
Create a 3D Model
Since one of the most common tasks is logo creation, we will construct a movie clip that
will display a 3d letter object, so we will extrude some text in 3d Studio.
Open 3D studio
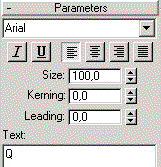
Click the "Shapes" tab and click on the "text" button

In the parameters section in the right pane, type the letter Q in the value of "text"
area.

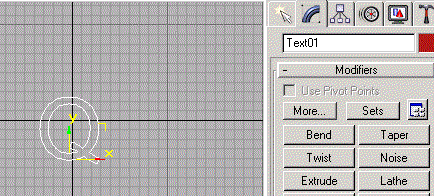
Place the letter in the front viewport and center it with the "Select and Move" tool
Click on the "Modify" tab and click on the "Extrude Button"

Place a value of 20 at the "amount" parameter.
This letter contains many curves. It is desirable to keep the final vertex number
small, in order to achieve a better performance. To reduce the number of curves we will place
an optimize modifier, so that the total number of vertices should be reduced to a minimal acceptable value.
While the letter is selected, click on the "More..." button and select the "optimize" modifier.
Adjust the optimize parameters at your taste. I set the Face threshold at 8, while I kept the other optimize
parameters (Edge thresh, bias, Max edge length) to zero. This reduced the number of
vertices from 354 to 48, and the number of faces from 708 to 96.
Click now on the "File/Export..." menu command, and save the file as an .ASC type.
Now you're done with the 3D model. Exit the 3D studio app.
Here you can download the .ASC file
Click to go to step 2


